2시간 내에 Profilo 프로젝트 문서를 도큐사우루스로 전환하기

“Joel and I were discussing having a website and how it would have been great to launch with it. 그래서 저는 혼자서 도큐사우루스를 적용해보았습니다. 대략 한 시간 반 정도 걸렸나보네요. 여러분의 맘에 드는지 확인할 수 있도록 내용을 정리해서 PR을 요청했습니다. Your workflow for adding docs wouldn't be much different from editing those Markdown files.”
— Note sent to the Profilo team
This is the story of the rather short journey it took to create the Profilo website using Docusaurus.
Profilo, an Android library for collecting performance traces from production, was announced earlier this year. The project was published on GitHub with a less than a handful or Markdown files to describe its functionality and no website to showcase any branding and highlight the logo. 그래서 기존 문서와 이미지를 웹 사이트로 전환해야 하는 과제가 남아있었습니다.
일반적으로 도큐사우루스에서 웹 사이트를 만들 때는 다음과 같이 진행합니다.
- 도큐사우루스 스크립트를 사용해 템플릿 웹 사이트를 만듭니다.
- 만들어진 템플릿 파일을 원하는 색상과 디자인으로 수정하고 프로젝트 설정(예: 웹 사이트, 깃헙 링크)을 변경합니다.
- 웹 사이트 콘텐츠를 만듭니다.
- 문서와 필요한 리소스를 추가합니다.
- 도큐사우루스에서 제공된 기본 랜딩 페이지를 원하는 모양으로 수정합니다.
- 기본 사이트 탐색 파일을 설정합니다.
- 웹 사이트를 공개하고 추가적으로 변경되는 문서의 게시 방법을 설정합니다.
마크다운 파일은 만들어놓은 것이 있어서 콘텐츠를 새로 만들 필요는 없었고 필요한 메타데이터만 추가해서 도큐사우루스에서 처리할 수 있는지만 확인했습니다. 때문에 남아있는 대부분 작업은 도큐사우루스에서 기본 제공하는 설정만 수정하는 것이었습니다.
한 일들 정리
웹 사이트로 전환하면서 어떤 작업을 했는지 정리해보았습니다. 디자인과 관련해 몇 가지 내용은 따로 정리했습니다.
Design and colors:
- 디자이너에게 필요한 로고 이미지를 모두 받았습니다. I had to create the .favicon one.
- http://paletton.com/ 온라인 도구를 사용해 웹 사이트에 어울리는 색상을 찾았습니다. 이건 정말 편리합니다!
Initial website setup:
- Forked the Profilo project on GitHub and created a local clone of the fork to set up the website.
- Created the initial Docusaurus website using the installation instructions.
- Deleted the
docs-examples-from-docusaurusandwebsite/blog-examples-from-docusaurusfolders as these would not be needed. Profilo는 기본 문서가 있었고 아직 블로그를 운영할 계획은 없습니다.
Content creation:
-
Added metadata to the existing Markdown files found in the
docsfolder, for example:---id: architecturetitle: Architecturesidebar_label: Architecture--- -
Added the logo assets to the
website/static/imgfolder. -
Modified
website/pages/en/index.js, the landing page, to highlight Profilo features. -
Modified
website/core/Footer.js, the footer, to simplify it for Profilo. -
Edited
website/siteConfig.js(website configuration file) to specify the previously chosen primary and secondary colors. -
Modified
website/sidebars.jsonthat specifies the sidebar navigation. 마크다운 파일에 추가한 메타데이터에 따라 모든 문서가 적절하게 표시될 수 있도록 합니다. -
깃헙 속성, 로고 이미지, 헤더 링크, 웹 사이트 링크가 표시될 수 있도록 웹 사이트 설정 파일을 수정합니다.
-
여기까지 진행하고 웹 사이트를 로컬에서 확인합니다. (I ran
yarn startfrom thewebsitefolder to start the server.)
Feedback and review changes:
- Sent a pull request to the project.
- 디자이너가 제가 선택한 색상에 깜짝 놀라며 다른 색상으로 수정했습니다(저는 디자이너가 아니니깐요 ㅠㅠ).
- 색상을 수정하고 PR을 업데이트했습니다.
- The PR was then accepted and merged. 무야호!
Website publishing:
-
도큐사우루스 게시 스크립트를 실행해 첫 번째 웹 사이트를 게시했습니다.
USE_SSH=true \GIT_USER=caabernathy \CURRENT_BRANCH=master \yarn run publish-gh-pages -
Configured CircleCI using the provided Docusaurus instructions. There were 2 PRs for this, the firstfor the initial config and the second to make sure CircleCI only triggered for changes in the master branch (thanks Joel Marcey!).
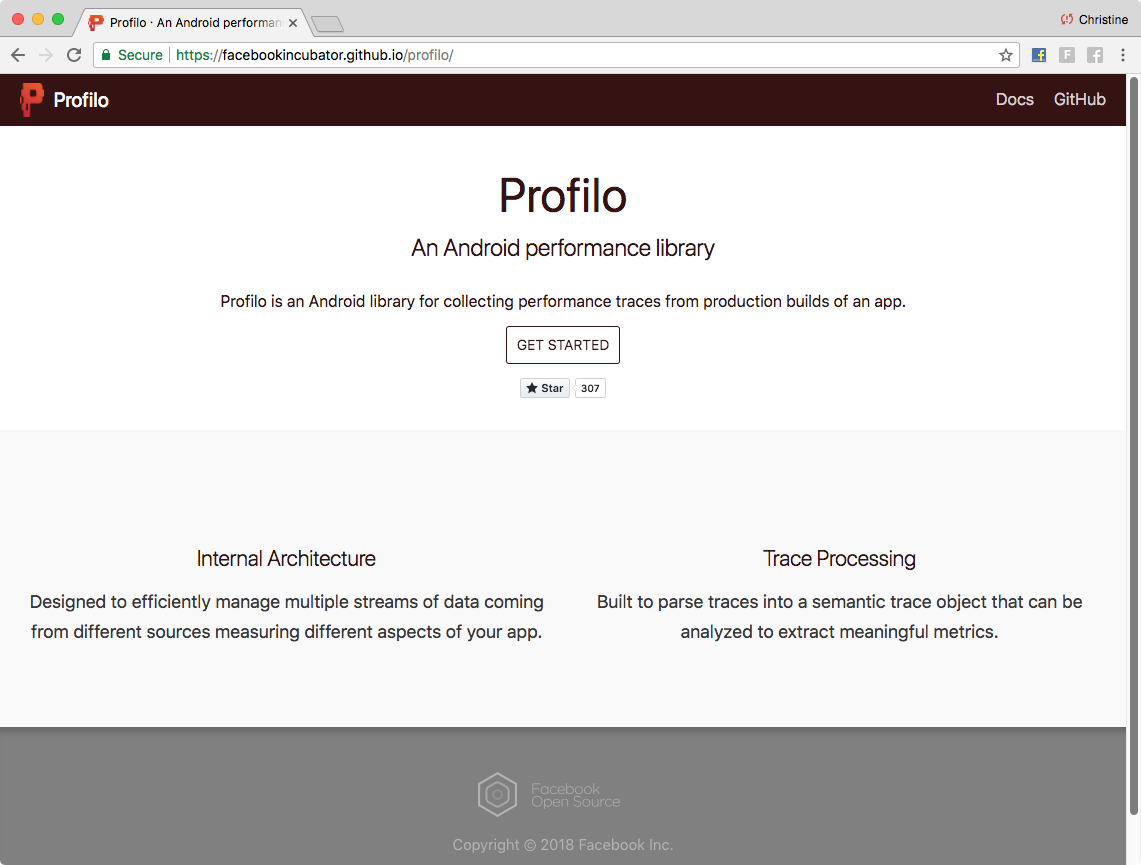
최종 웹 사이트는 https://facebookincubator.github.io/profilo/에 게시됐습니다. 최초 PR 단계까지 한 시간 반 정도 걸렸고 리뷰 후 피드백을 받고 수정해서 웹 사이트를 게시하는 건 30분 정도 걸렸습니다.
디자인
아래는 첫 번째 풀 리퀘스트 요청 시 초기 웹 사이트의 모습입니다.
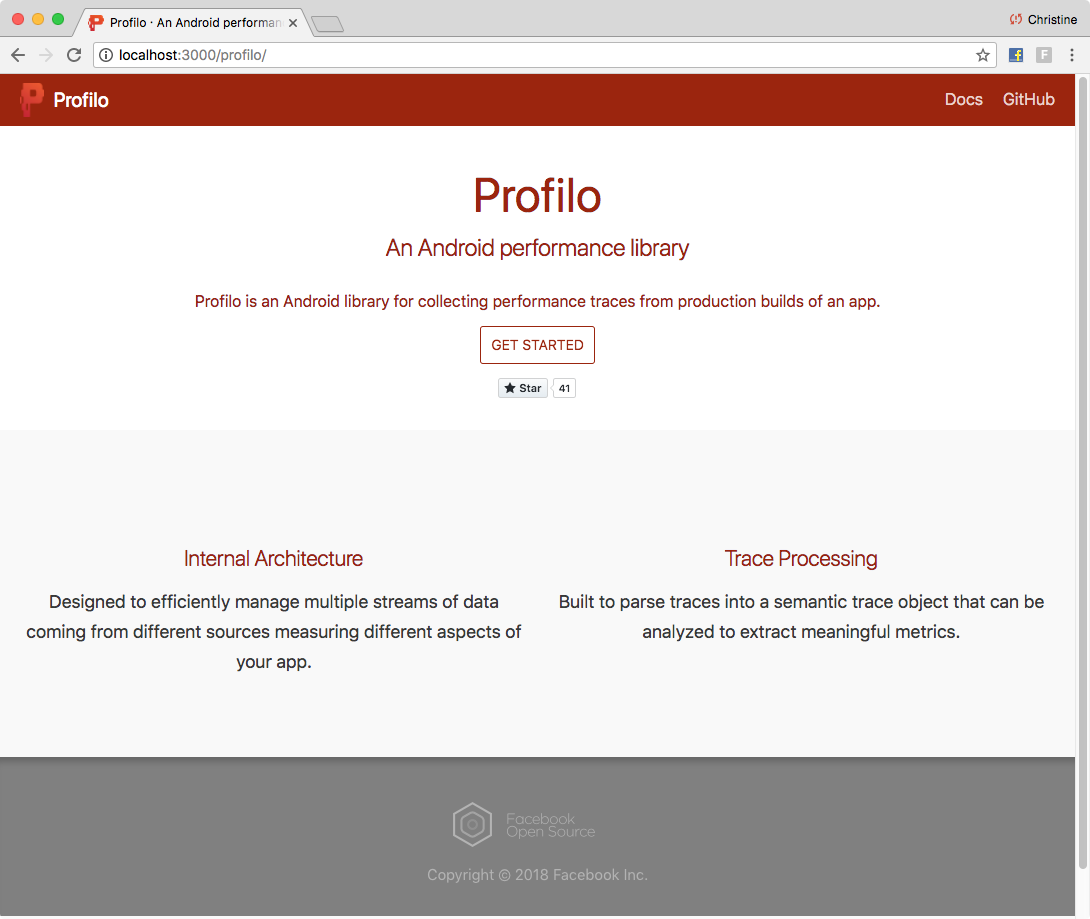
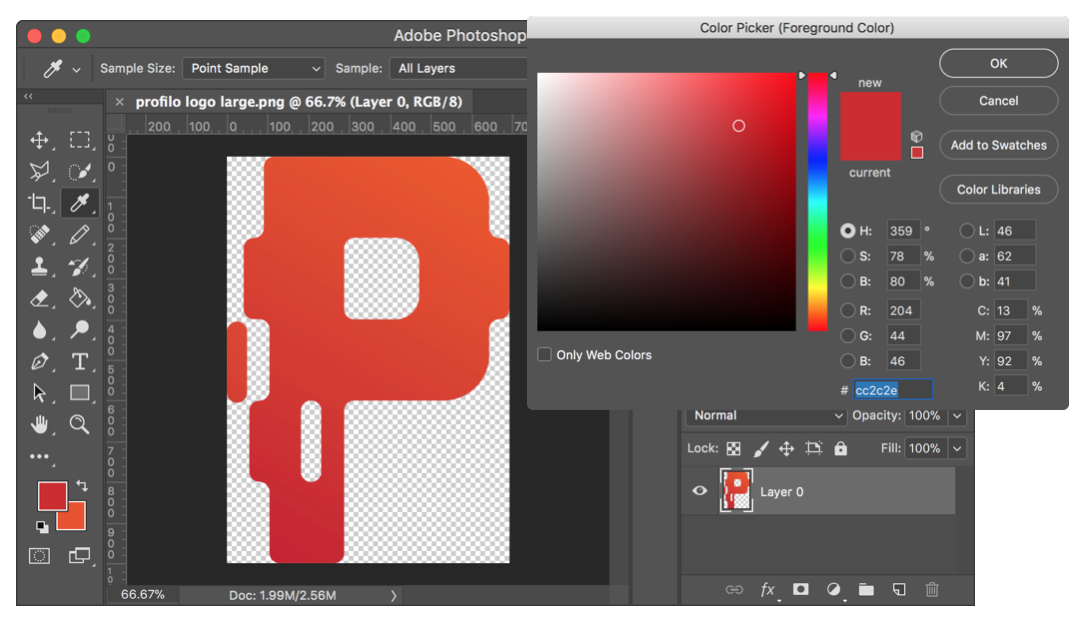
콘텐츠를 만드는 대부분의 시간은 우리의 로고와 잘 어울리는 색상을 선택하는데 사용했습니다. 이렇게 선택한 색상은 디자이너가 피드백을 줄 때 나름 도움이 되었습니다. 저는 포토샵을 사용해 다양한 형태의 로고 샘플을 만들어보았습니다.
I then took the RGB representation of the color and set it as the baseline color on Paletton. 그리고 도큐사우루스 웹 사이트 설정 파일에서 변경할 수 있는 다양한 색상 옵션을 적용해보았습니다.
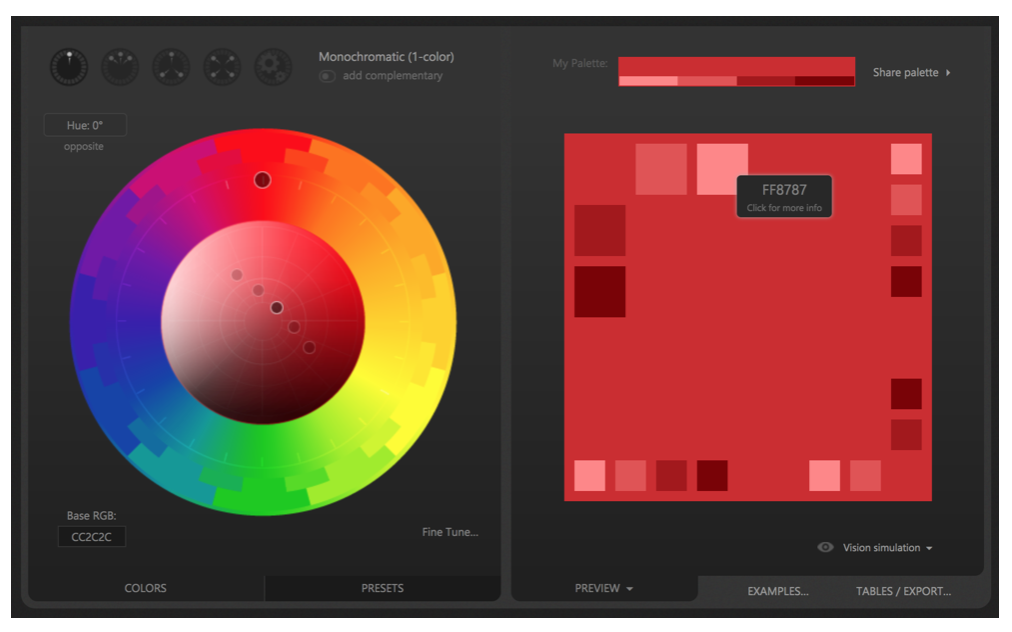
선택한 메인 색상과 서브 색상을 기준으로 디자이너는 피드백을 작성해주었습니다.
도큐사우루스에서 만든 기본 웹 사이트도 일부 수정했습니다. 바닥글을 간결하게 정리하고 랜딩 페이지에서 Profilo 프로젝트의 주요 기능을 확인할 수 있게 수정했습니다.
최종적으로 공개된 웹 사이트는 아래와 같은 모습입니다.
콘텐츠 페이지는 아래와 같은 형태로 보여집니다. 시작하기 페이지입니다.
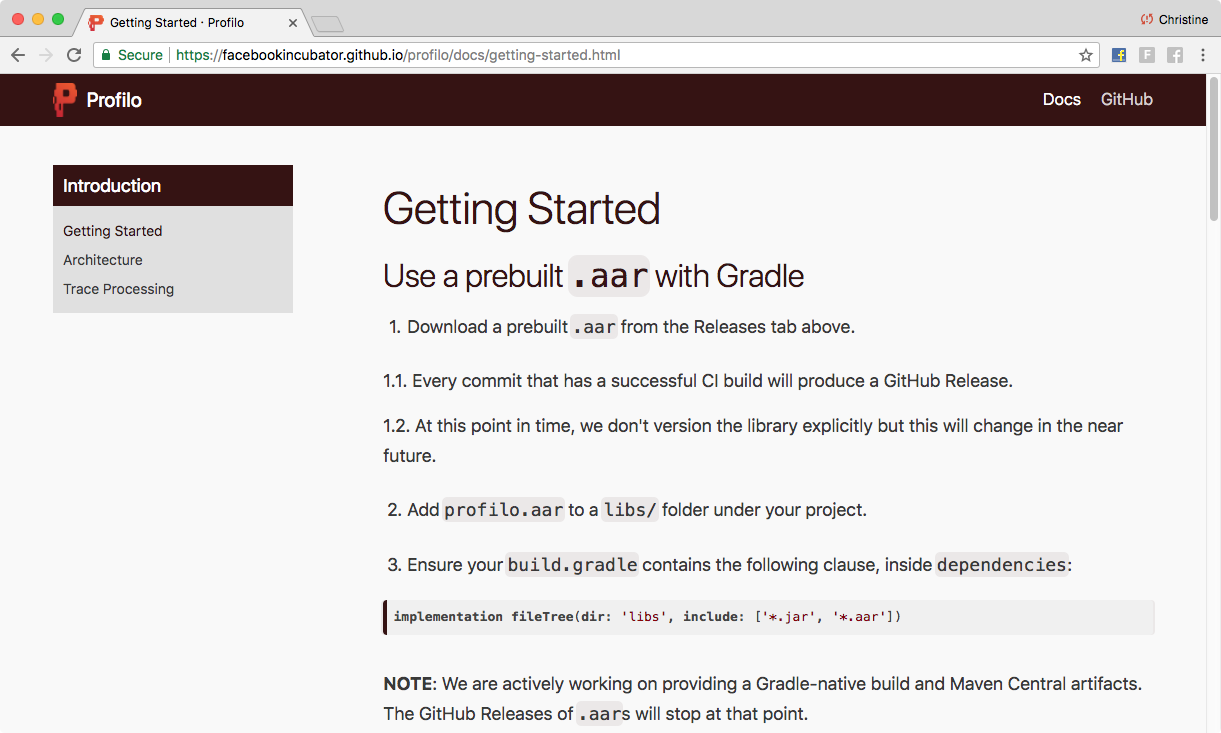
This also shows the sidebar structure that was set up through editing website/sidebars.json.
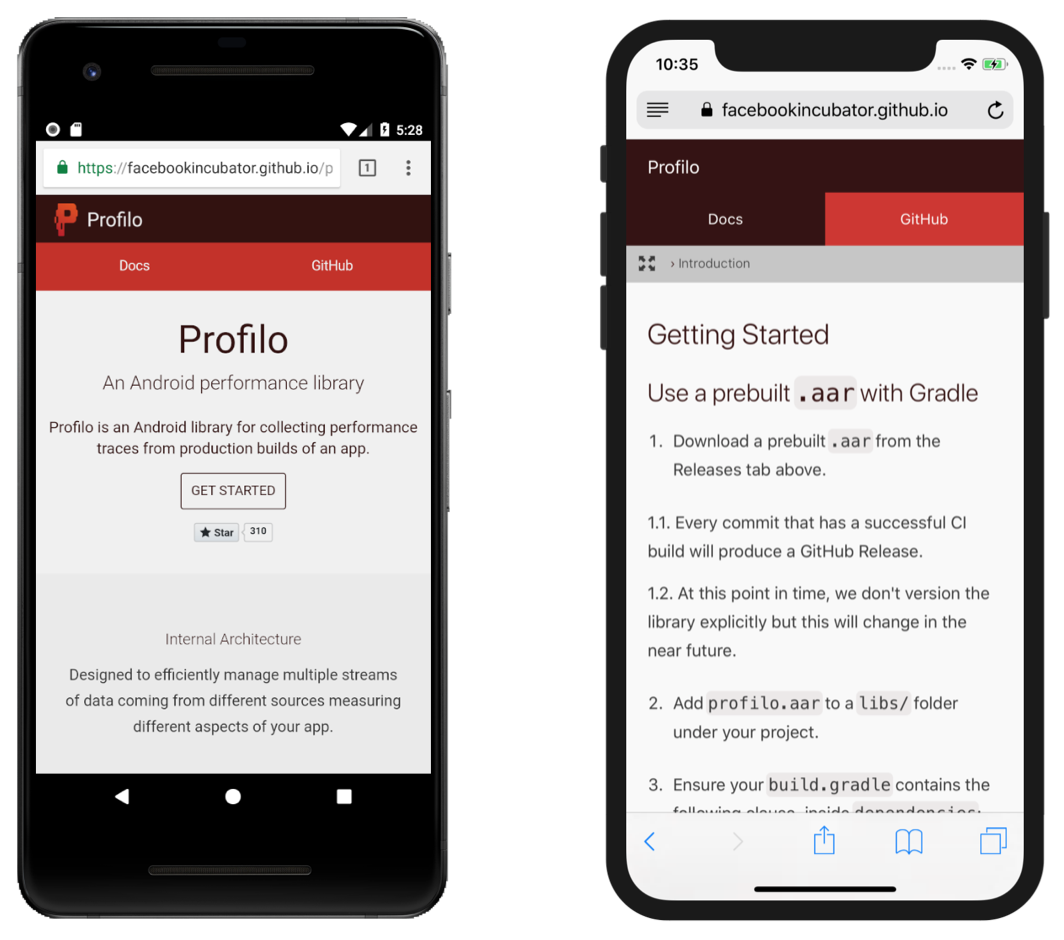
반응형 디자인에 대한 고민도 필요 없습니다. 그냥 도큐사우루스로 시작하기만 하면 됩니다!
글을 마치며
Profilo 개발자들은 기존 콘텐츠를 업데이트하기 위해 워크플로우를 변경할 필요가 없다는 점에 만족하고 있습니다. 그 전처럼 마크다운 파일로 문서를 만들기만 하면 됩니다. 새로운 문서를 추가할 때도 마찬가지입니다. 물론 사이드바 탐색 기능을 위해 약간의 설정 변경이 필요하긴 하겠지만요.
도큐사우루스를 사용해 마크다운 파일을 멋진 웹 사이트로 전환하는 건 정말 간단합니다. 이전 프로젝트에서는 3개 문서 파일만 달랑 있었지만 이제는 Profilo 프로젝트가 좀 더 전문성을 가진 것처럼 보입니다. 이 만큼 짧은 시간을 투자해서 이런 결과를 만드는 건 정말 가치 있는 일입니다.